How to Prune an Elm Tree Safely: A Step-by-Step UK Guide
A practical UK guide to pruning elms safely — the right season, the right cuts, the right tools, and the clean-up that keeps disease out.
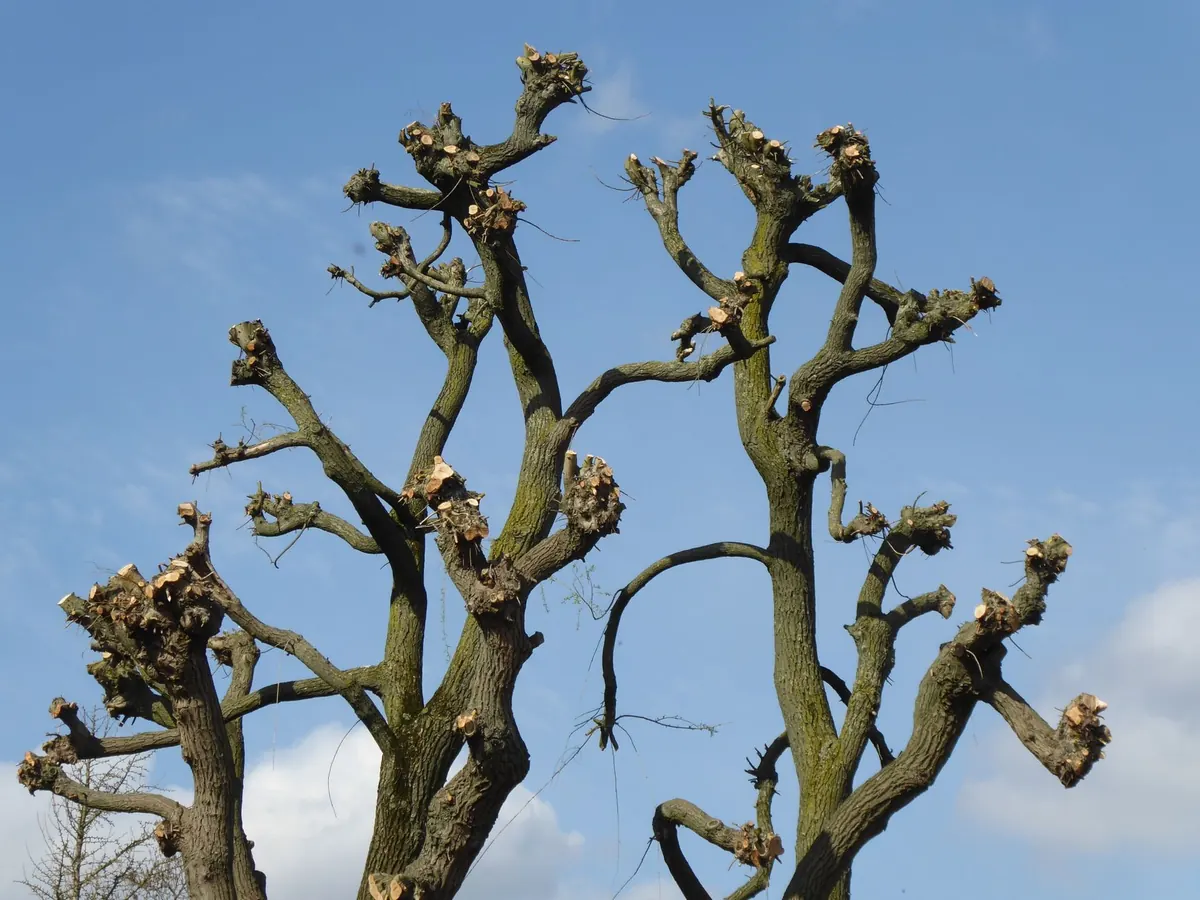
A mature elm is a genuinely uncommon sight in Britain. Dutch elm disease swept through our hedgerows, parks and streets from the late 1960s onwards and never really went away, so most elms you meet today are young trees, suckers or hedgerow regrowth. That changes how you should approach pruning. On an oak or an apple, a slightly clumsy cut is usually a small cosmetic problem. On an elm, a cut made at the wrong moment can be the doorway through which beetles and fungus walk in. Get the timing and technique right, though, and you can shape a tree, keep it safe and give it a decent chance of a long life.
Why Elm Pruning Is Different
Dutch elm disease is a fungal infection spread mainly by elm bark beetles, which are drawn to fresh wounds on elm bark. A cut made in mild weather is essentially an invitation: the exposed sap and damaged tissue attract the beetles, and the beetles carry spores. The fungus also travels underground, passing between neighbouring elms through grafted roots, which is one reason elms often seem to die in clusters.
There is no reliable cure for an established case in a mature tree, so pruning is not a treatment. It is prevention and management: removing dead or dangerous wood, thinning congested growth and keeping a young or re-growth elm in a sensible shape before problems start. Once you suspect infection, sawing at the canopy will not save the tree and may simply spread the problem further.
The Best Time to Prune an Elm in the UK
Mid-winter is the safest window, roughly late November through February, when the tree is dormant and beetle activity is at its lowest. Beetle flight generally runs from spring into early autumn, varying with region and weather, so treat April to September as a no-go period for anything elective.
There is a trade-off here. Elms seal wounds slowly, and cuts made in cold weather sit open for longer than cuts made in early summer. The beetle risk outweighs that, so the compromise most experienced growers accept is a light prune in the depths of winter rather than a heavy tidy-up in June. Avoid working during hard frost, when branches can shatter rather than cut cleanly, and avoid pruning a tree that is already stressed by drought.
If a limb breaks in a summer storm, deal with it — safety comes first. Keep the cuts to the minimum needed, remove the debris from site the same day, and leave everything else for winter.
Tools Worth Having
Sharp, clean tools make clean cuts, and clean cuts are the whole point. A rough, crushed cut is slow to seal and gives disease an easier entry.
- Bypass secateurs for growth up to about a finger's thickness.
- Loppers for thicker shoots you can reach from the ground or a low branch.
- A pruning saw with a narrow blade — a curved Japanese pull saw is ideal for tight angles between branches.
- A pole saw or extendable pruner for high, slender growth. If you need a ladder plus a saw at height, that is a job for a professional, not a weekend.
- Gloves, eye protection and a helmet whenever there is anything above your head.
- Methylated spirits or a diluted household disinfectant and a cloth, to wipe blades between trees.
- A tarpaulin to catch prunings, so nothing is left lying around the base of the tree.
How to Make a Cut That Heals
Elms have a distinctive raised ridge where a branch meets the trunk, known as the branch collar, and a matching bark ridge along the top of the joint. That collar is living tissue that produces the tree's defence against decay. Cut into it and you remove the tree's own bandage.
For anything thicker than a couple of centimetres, use the three-cut method so the weight of the branch does not tear a strip of bark off the trunk:
- Make an undercut about 30cm out from the trunk, cutting roughly a third of the way through from below.
- Make a top cut slightly further out, until the branch drops. The undercut stops the bark ripping.
- Cut the remaining stub back to just outside the branch collar — not flush with the trunk, and not leaving a long peg either. Angle the cut so water runs off.
Skip wound paints and sealants. They are not recommended for this kind of work and can trap moisture against the wood.
What to Remove and What to Leave
Work to the three Ds first: dead, diseased and damaged wood. After that, look for branches that rub against each other, crossed growth and weak, narrow-angled forks that are likely to split. On young elms, keep the strongest central leader and take out competing shoots, but do it gradually.
Suckers and epicormic shoots — the tufty growth that appears on the trunk and along old limbs — can be thinned, but do not strip them all at once. They are feeding the tree. Take a proportion each winter and let the tree adjust. As a general rule, remove no more than about a quarter of the live canopy in any single year.
Stop and call in a qualified arborist if you see wilting shoots curling into a shepherd's crook, yellowing or browning leaves on one side of the canopy in summer, or dark streaking in the wood under the bark. Those are classic signs of Dutch elm disease, and pruning is not the answer.
Legal Checks and Working at Height
Before you cut anything, check whether the tree is protected. In the UK, a Tree Preservation Order or a conservation area designation usually means you need consent or advance notice from your local planning authority, even for modest pruning. Larger volumes of timber may need a felling licence, and hedgerow regulations can apply to hedgerow elms. Rules differ slightly across the four nations, so confirm with the relevant council or forestry body first.
Never work within reach of overhead power lines. Stay well clear and contact the network operator if branches are close. Anything involving climbing, chainsaws or rigging out a large limb belongs with a trained, insured arborist who carries the right kit and knows elms.
Clean-Up, Aftercare and Knowing When to Stop
Elm prunings left stacked in a damp corner are perfect beetle breeding material. Chip them, bag them for the tip, or burn them — and do it promptly rather than leaving a pile beside a healthy tree. Wipe your tools down before you move on to another elm, and again before you put them away.
After pruning, give the tree an easy year: water young elms through dry spells, keep strimmers and mowers away from the base, and resist the urge to tidy up further. A light mulch of well-rotted organic matter over the root zone, kept clear of the trunk, is plenty.
Finally, be honest about your limits. If the tree is large, if the branches overhang a road, a building or a neighbour's garden, or if you are not confident on the ladder, book a qualified arborist for the winter window and let them handle it. A well-timed, well-made cut is one of the kindest things you can do for an elm in Britain. A rushed one in July can undo years of careful growth.
Photo: Timothy Huliselan / Pexels